Garden of Eden Banhammer Squad

Deck Primer
Arc+Serp+Gira Meta-Counter Toolbox
[This is a deck that I made with a bunch of stupid vanity cards for fun, if you want to see a cheaper and easier to export version go here: https://pokemoncard.io/deck/garden-of-eden-banhammer-squad-simplified-81568 ]
God, Satan, the stupid snake with the apple, the gang's all here to beat Charizard's ass, etc
This deck functions as a sort of toolbox to try to counter as many situations as possible. It runs a very tight ship that revolves around having a huge variety of single-copy cards with very specific purposes available to you to deal with as many different matchups or situations you might be in.
It's able to manage running so slim and varied by synergizing Arceus VSTAR's Starbirth and Peony's 'pick 2 of any card' superpowers to get exactly which of these wide variety of cards you need for your specific matchup, Arceus VSTAR immediately energy turbocharging your main attacking pokemon by turn 2 with Trinity Nova and the help of Double Turbo Energy, Serperior VSTAR's energy movement with Regal Blender to make sure the energy Arceus attaches gets to where you want it and preserves a slim energy count on your board for as long as possible by passing it around before it gets lost in a KO (as well as being a grass-type dark meta counter and a no retreat cost pivot) and, combining this with Trinity Nova's ability to get both types of energy it needs immdiately and using spare DTE's to burn into the Lost Zone, sets up for Giratina VSTAR's 280 damage bomb with Lost Impact to sweep at the end, one-shotting a lot of pokemon in the game and KOing anything else after some chip damage from Arceus and Serperior.
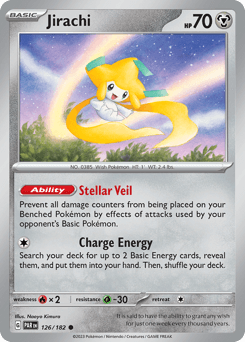
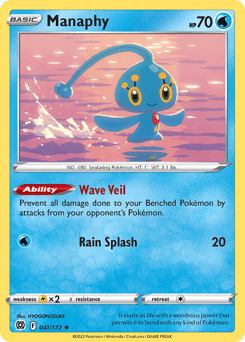
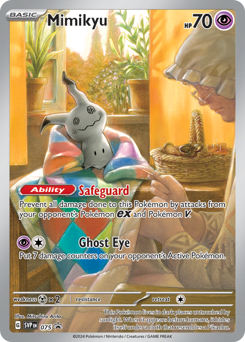
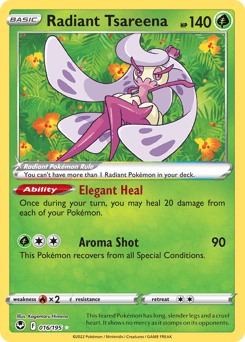
These main attackers are joined by situational support pokemon that can fill important roles against different decks with their abilities: Mimikyu for stalling and chip damage, Toedscruel (Paradox Rift) to shut down Energy Retrieval and Pokestop, Toedscruel ex to protect from a variety of common threatening attack effects such as damage counter placement and one-hit-KOs, Radiant Tsareena to act as a healer against Panic Mask and various chip damage, and Manaphy and Jirachi to protect your bench from damage.
Here's a way too in depth guide for what each card's purpose is and how I play them against different decks!
==========
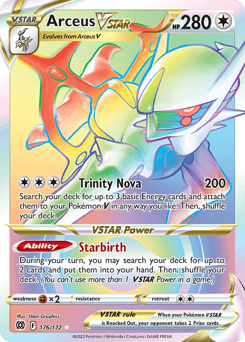
-Arceus VSTAR's Starbirth and Peony give you the very powerful ability to draw the specific cards you need for the specific matchup you find yourself in
-Arceus VSTAR's Trinity Nova turbocharges specific types of energy onto your 2 other main attackers - Serperior VSTAR and Giratina VSTAR, who benefits a lot from Arceus being able to put both grass and psychic energy onto it immediately.
-Serperior VSTAR plays a lot of roles as a sort of board manager once Arceus puts energy onto everything it can, such as countering dark type meta with a super effective grass-type hit of 380, freely moving energy around to synergize with Arc's Trinova turbocharging to get energy wherever it needs to be, and being a no retreat cost pivot that is essential to allowing this deck to run pretty slim on pokemon swapping cards.
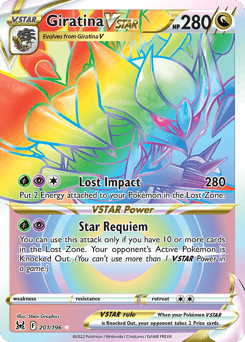
-Giratina VSTAR is still an enormously threatening monster that can still straight up one shot any pokemon in the game with Lost Impact that isn't a VMAX or stage 2 EX, and even any of those it will be able to if the opposing mon gets chipped by Arceus, Serperior or Mimikyu first.
When setting up to play, try to only put a single pokemon on the board in your active spot - this lets you not only more carefully plan what to put down based on what you see when the game starts to keep anything that's useless for your matchup off the board and safe from getting sniped, but also helps hide what you have in your deck from your opponent to keep them guessing, especially if you put down something common or flexible like Arceus, Manaphy or Mimikyu that doesn't give away exactly what deck you're playing.
The exception to this is if you're against Roaring Moon - if they are going second, make sure to do everything you can to get ANY other mon on your bench, because they can easily one shot anything you put out on turn 1 and you don't want to auto-lose for not having any benched backup.
I'm not going to say this deck is a surefire win every time since it relies on a lot of single-copy cards and can fumble if you get a bad hand at the wrong time or get the wrong cards prized, but for me the variety that comes from that makes it really fun and VERY satisfying when it all comes together, which it's able to do pretty often.
==========
>>>MAIN ATTACKERS<<<
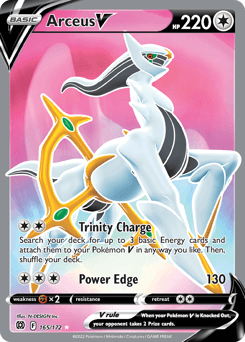
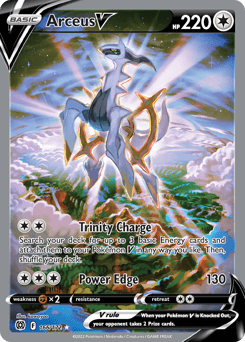
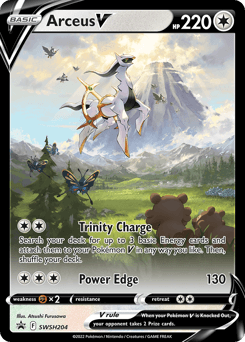
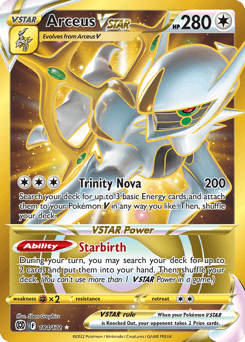
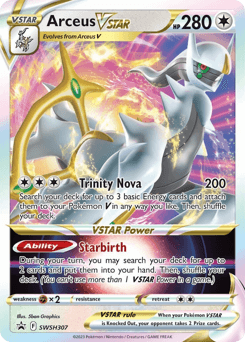
Arceus V + VSTAR
")
-VERY IMPORTANT: You want to pull Arceus V first turn if at all possible and put in active spot first, and ALWAYS choose to go first if you can so you can attach energy to it ASAP
-Three in deck to hopefully pull one first, but use Nest ball, Ultra Ball or Adventurer's Discovery if going second if needed
-Exception to this is if you can tell you're going up against Roaring Moon:
-Mulligans revealing Moon/Darkrai/G.Moltres/Morpeko/Dark Patch/Sada's Vitality etc can show you this to know what to put in the active spot when you're setting up your bench, and you usually want to put out a sacrificial single prize card to outpace Moon's prize card tradeoff race - preferably something that's still useful like Mimikyu (which can force them to kamikaze with Frenzied Gouging to hit it), Jirachi for energy grabbing or Spore Toedscool that can inflict sleep to stall and prevnt retreats (but keep in mind you may want Toedscool alive to counter Moon with it's evolutions as well.) Even if it's not something useful, you have TMs in your deck they can use if you can get them.
-Even during the coin flip choice, sometimes people's Roaring Moon/Darkness Energy/Darkrai card backs can give this away enough to guesstimate without actually knowing lol - if you think you're against Moon choose to go second so they can't use Dark Patch+Sada's Vitality+second turn attack to immediately sweep you
==========
Your biggest main goal for winning a match:
-Get an energy on Arc first turn (preferably a DTE)
-Evolve to Arc VSTAR second turn (pull with Adventurer's Discovery, Jacq or Ultra Ball if needed)
-Use Starbirth to grab 2 cards:
-A second energy if you don't have one in hand to attach (DTE if you attached a basic first turn or basic/jet energy if you attached DTE first)
-Switch/Jet Energy (or Serp VSTAR for its free retreat if Serp V is in active) to get Arceus to the active spot if needed
-Any other situational cards you need if neither of those are needed
-Turbo energize benched V pokemon with Trinova ASAP (ALWAYS try to turbo Serperior first so it can pass it's energy off and pivot.)
==========
-Trinova synergizes extremely critically with Gira to get both the grass and psychic energy it needs immediately, and putting both on Serp first will let it pass them both to Gira as well. If you haven't been able to evolve to Arc VSTAR yet, just use Trinity Charge until your energy is in place, and then either retreat or take potshots with Power Edge if you're still alive by then.
-Try to keep as even of a proportion of grass and psychic energies in play, both attached to mons and in your deck. Don't attach all of one single type if you can help it. Serp only needing one grass energy instead of 2 or 3 helps a lot with this.
==========
>>>Good general Starbirth choices besides a second energy or switcher<<<
-Cheren's Care (or Turo's Scenario) to pull it off the board after taking a free hit if you can tell it won't get one-shot. (Cheren's Care also pulls back any energies or tools on it unlike Turo's Scenario, so opt for that if possible)
-Adventurer's Discovery to get your other V mons on bench for Trinova energizing. (ALWAYS try to get Serp VSTAR up and running first for energy management/planning for Gira and pivoting, especially if you need Serp VSTAR's free retreat to get Arceus into active)
-Arven if you need tools like TMs/Camo Poncho or items like Nest Ball, Lost Vacuum or Ultra Ball to get Serp VSTAR/Toedscruel
-Boss's Orders if you see an immediate opportunity for Arc to one-shot any 180 HP-or-under 2-prizers like Lumineon, Mew V/EX etc, any threatening baby basics like Charmander, Sprigatito, Abra, Ralts, Pidgey etc to disrupt evolution on stage 2 rare candy decks, or toolbox mons like Bibarel, Baxcalibur, Kirlia, Cherrim, Radiant Greninja/Charizard etc.
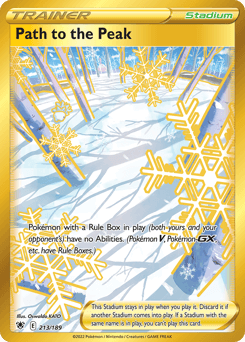
-Path to the Peak if dealing with rulebox ability heavy decks (after using Starbirth you won't need them unless you need Toedscruel EX or Radiant Tsareena)
Always focus on studying the cards you see your opponent using and trying to figure out what deck your opponent is running so that you can plan ahead and get what you need for the matchup you're against if nothing like energy/switcher for Arceus is needed. Do some research on common deck builds and study any decks you play against to try to recognize cards that give away what deck they have and plan out ways to counter cards that are probably a part of that deck.
This can very often make or break the whole game.
==========
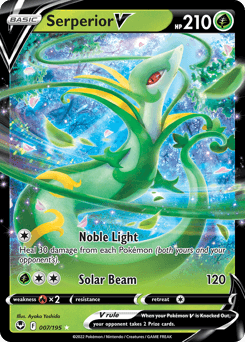
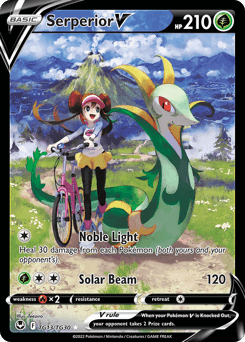
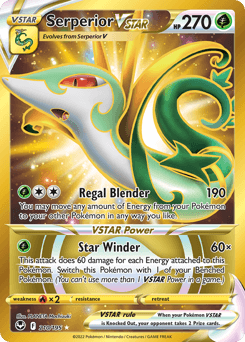
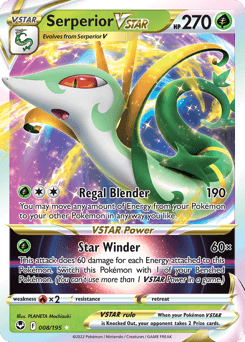
Serperior V + VSTAR
")
-Grass Type to one shot dark meta mons like Tera Charizard EX and Roaring Moon
-Energy mover to synergize with Arc and Gira to pull off a very slim energy deck despite Gira perma-burning energy into the lost zone
-No retreat cost for invaluable pivoting to give you a surprisingly huge amount of movement to keep what you need in your active spot at all times, despite only having one switch/jet energy and 2 scoop up supporters
-ALWAYS try to turbo energize Serperior first as quickly as possible so that it can pass it's energy to a bench pokemon, this deck runs very tight on energy because of Arc and Serp being able to attach and manipulate energy easily
-Serp V has a retreat cost but VSTAR does not, so try to evolve it ASAP to be a pivot
-Hit with Regal Blender (can one shot 190 or less mons like Rotom V, Lumineon, Mew V/EX etc and usually puts a two-shot dent into anything else), then transfer it's energy around the turn before you expect it to get KO'd
-Use Blender to move energy off of Arc if it's still on the board and won't need it again, give energy to Gira if it needs it, and give energy to non-V pokemon that can't be energized with Arceus like Mimikyu and Toedscruel EX
-Star Winder can be used in emergencies for a possibly huge hit and free pivot if you end up in a spot where you won't be able to pull off Starbirth for whatever reason
==========
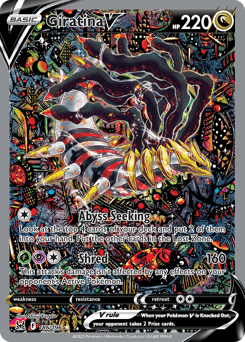
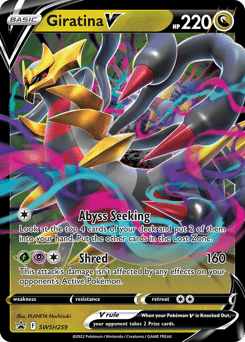
Giratina V + VSTAR
")
-Can still straight up one shot any pokemon in the game with Lost Impact that isn't a VMAX or stage 2 EX, and even any of those it will be able to if the opposing mon gets chipped by Arc/Serp/Mimikyu first.
-Arc energy turbo combined with Serp energy movement and DTE's make Lost Impact very useable, but be sure to plan out your energy very carefully before letting Gira burn everything down
-ALWAYS try to go in order of playing Arceus first, Serperior second and Giratina last for your general attackers. Arc starts energy turbo, Serp moves energy where it's needed while chunking out HP and pivoting, and Gira sweeps up at the end.
-Use Gira last because of it putting energy permanently into the lost zone - use those energies on Arc and Serp first, then use Trinova and/or Blender to make sure your energies are set up and any high HP mons get chipped under 280 first before dumping them into Gira to clean up
-DTEs are perfect to use as single-card kindling to burn into the lost zone, and don't forget Gira can burn energy off of bench mons and not just itself to avoid the damage reduction from attaching a DTE directly to it - toss it off of Arceus if it's still in play and attach any spares to bench mons if you have turns without other necessary energy attachment needs. Always try to attach some sort of energy to something every turn to have on standby for Gira to burn
-If there are mons with 280 HP or less that are immediately threatening on your opponent's board, you might turbo Gira first if you want/need them gone ASAP, but be careful as this can leave you with an energy deficit very quickly unless you pull plenty of DTEs to burn, have a way to get Arc back in active to re-energize (and have energy left in your deck to do so - try to keep track of what's in there whenever you use Trinova or have a chance to search your deck), or plan out your prize count tradeoff race carefully
-Some exceptions could be if you're up against a fire deck and want to keep Serp off the board, or if you get bad draws and aren't able to get Serp out soon enough, but energy can be difficult to manage this way for the above reasons
!!! Important Tip !!! : Gira V's Shred kills Mimikyu, Aegislash and Miltank because of ignoring effects on opponent's pokemon, so if you need it hold off on evolving it
==========
>>>SITUATIONAL SUPPORT POKEMON TOOLBOX<<<
(Try not to put these on the board unless the situation calls for it)
Mimikyu
")
-Necessary awful little shit staller, immune to any V/EX cards
-Try to get it on the board just before you think you'll need it there to pivot into
-Can completely lock down a game if your opponent has no baby cards available, or can make their life hell by forcing them to waste turns/energy/switches/retreats trying to use small chip damage from baby toolbox cards like Manaphy, Flaaffy etc
-Excellent against rulebox-dominant decks like Miraidon, Gholdengo, Chien-Pao and like, almost anything else really since rulebox decks are 95% of the meta.
Examples of things to watch out for in just these decks I mentioned: baby Zapdos or Zeraora in Miraidon decks if they have them, Radiant Greninja if Gholdengo is paired with Origin Palkia with water energy, and Baxcalibur or Radiant Greninja in Chien-Pao decks, which can use Baxcaliburs Super Cold to get the energy needed to swap in and hit it. Counter Greninja with Manaphy.
-Good to chip down cards like Tera Charizard EX, Urshifu VMAX or other high HP stage 2 EX/VMAX cards to set up to get shot down by heavier attackers.
Things to watch out for in these decks: Charmeleon in Charizard decks can one-shot it with Heat Tackle as well as Growlithe with Fire Claws if Arcanine EX is included in the deck, and Inteleon VMAX in Urshifu decks can KO it with Double Gunner. Double Gunner won't get blocked by either Toedscruel EX or Jirachi since it's an ability an not an attack, so choose wisely whether to put it on the board.
-Can paralyze Roaring Moon decks, either by forcing Moon to kamikaze with Frenzied Gouging to hit it and leaving it with a tiny amount of HP to get easily KO'd by a mon in waiting, or if paired with Toedscruel EX to protect it from Frenzied Gouging, is completely unkillable. Keep in mind Morpeko and baby G.Moltres can kill it if they have it on the board, though.
-Can work really well against Mew VMAX as well, but be careful that they don't have 2 Mew VMAX on their board at once or 2 Psychic/Fusion Strike Energies attached to it - They'll be able to use Cross Fusion Strike to use the second one's Max Miracle attack (or it's own if it has the psychic/fusion strike energy for it and not just a DTE), which ignores effects on your opponent's pokemon and can therefore kill it. Try to protect it from Meloetta if possible too
-Be wary of letting it get sniped by Radiant Greninja in water/lost box/Gholdengo decks, Shining Arcana Gardevoir, Cresselia etc, or anything that places damage counters like Iron Valiant, Meowscarada, Inteleon VMAX, Medicham V, Cresselia, Radiant Alakazam etc - pair with Manaphy, Jirachi, Toedscruel EX or Path to the Peak if you need to shut off abilities like Tachyon Bits, Bouquet Magic, Double Gunner or Painful Spoons to protect it.
-Also be wary of V/EX cards with 'this attack is not affected by any effects on your opponent's pokemon' like Duraludon VMAX, Giratina V, Mew VMAX etc
-Watch out for Cancelling Cologne and Ting-Lu's Cursed Land.
==========
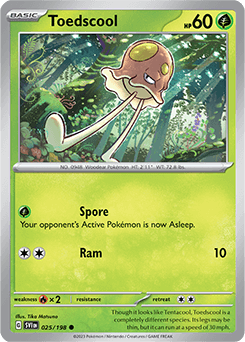
Toedscool SVI 25 + Toedscruel PAR 185
")
-Severely cripples or locks down Energy Retrieval and Pokestop decks like Gholdengo, Chien-Pao, Roaring Moon and Meowscarada, try to get on bench ASAP for these
-Also blocks Darkrai VSTAR's Star Abyss, important to keep them from pulling out more Dark Patches in Darkrai/Roaring Moon decks
-Blocks Klara
-Does not block anything that puts mons or energy directly on the board like Lugia VSTAR's Summoning Star, Dark Patch, Sada's Vitality etc
-Spore Toedscool is my choice of a basic - can stall or prevent retreats with sleep for a single grass energy if it ends up in active spot
-Only 1 Toedscool in the deck, so size up your situation and choose to evolve into either baby Toedscruel or Toedscruel EX depending on what you need for your matchup - use Nest Ball, Ultra Ball, Jacq, Evolution TM or Starbirth to get what you need
-Klara can grab it back out of discard if it gets sniped and is necessary to get back to lock down the game
==========
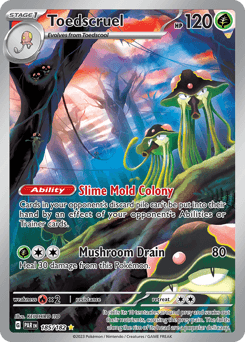
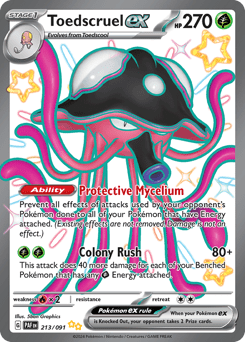
Toedscruel EX
")
-Counters a lot of meta decks that rely on attack effects, try to get on bench ASAP if needed
-Remember that its ability only works on pokemon with energy attached
-Remember damage counter placement in attacks is always an effect - and unlike Jirachi, Toedscruel EX blocks damage counter placement on mons in your active spot and from non-basic cards
-Blocks Roaring Moon's Frenzied Gouging - pairs well with Mimikyu to paralyze the deck
-Blocks Giratina VSTAR's Star Requiem as well as Lost Box Sableye - if you're against lost box get it out there ASAP
-Blocks Tsareena EX's Icicle Sole, Cofagrigous EX, Medicham V, H.Braviary or anything else that places damage counters
-Blocks status ailments, damage reduction/negation like with A.Vulpix VSTAR and Regieleki V, and OHKO attackss like baby H.Zoroark's Doom Curse
-Does not block things like Iron Valiant's Tachyon Bits, Meowscarada's Bouquet Magic, Radiant Alakazam's Painful Spoons, or Hawlucha's Flying Entry since they are abilities and not attacks
-Rule of thumb, if your opponent uses an attack that has no damage number to the right of it, it probably blocks it entirely
-Can be a backup attacker
==========
Radiant Tsareena
")
-Chose this as my Radiant because it fills in some important gaps that need to be countered
-Use against Panic Mask decks like Tsareena EX to keep HP healed above 30
-Also good against decks like Ting-Lu and Meowscarada that rely on damage counters being on your mons to hit them harder
-Good counter to Iron Valiant's Tachyon Bits and Radiant Alakazam
-Heals up from Gapejaw Bog, Calamitous Snowy Mountains etc
==========
Manaphy
")
-It's Fucking Manaphy (blocks bench damage)
-Use to protect Mimikyu or other low HP mons from Radiant Greninja, Scream Tail etc
-Blocks 'damage to one of your opponents pokemon' attacks from things like Scream Tail, Garchomp EX etc
-Blocks Ting-Lu's Land Scoop bench chip damage to counter it's Cursed Land ability
==========
Jirachi
")
-Blocks bench damage counter placement
-Remember it only blocks damage counters from basic mons - won't work for things like Tsareena EX or Cofigrigus EX
-As with Toedscruel EX, does not block things like Iron Valiant's Tachyon Bits, Meowscarada's Bouquet Magic, Radiant Alakazam's Painful Spoons, or Hawlucha's Flying Entry since they are abilities and not attacks
-Completely declaws Lost Box Sableye (finally)
-Blocks Medicham V and Cresselia
-Can help with grabbing energy in a pinch, but be careful to plan this out and only use it if you really need it so that Arceus has enough energy in your deck for Trinova turbocharging instead of it being in your hand.
==========
>>>ITEMS<<<
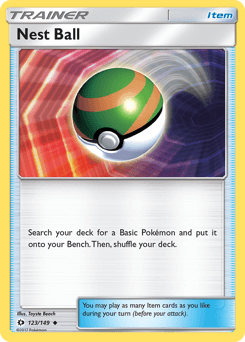
Nest Ball
")
-4 in deck to help pull what you need first turn.
-You could probably use Battle VIP Pass if you'd rather, but I feel like it doesn't synergize well with how this deck works overall, since you usually only want a small number of specific mons on the board to counter whatever is on the board as the match evolves, rather than on turn 1 to keep anything you don't need on your board from getting sniped.
==========
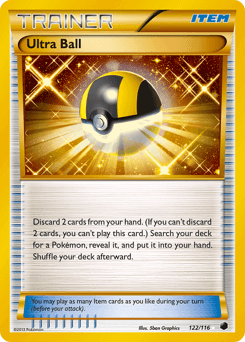
Ultra Ball
")
-Use sparingly as a last resort, this deck runs a very tight ship and discarding cards should usually be avoided unless you have things in your hand you know you won't need for a matchup
-Emergency puller for Arceus VSTAR, Serperior VSTAR, Toedscruel etc that can't be pulled with Nest Ball (or any other emergency needs if Nest Ball isn't available) or if Jacq or Adventurer's Discovery aren't available
==========
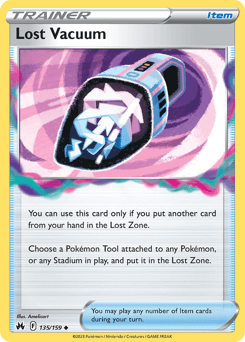
Lost Vacuum
")
-Necessary for destroying both stadiums and tools
-Get rid of Path to the Peak if you need to for Starbirth, Toedscruel EX or Radiant Tsareena
-Kill stadium decks like Beach Court Miraidon, Magma Basin, Calamitous Snowy Mountains, Gapejaw Bog, Pokestop etc
-Cripple anything that relies on tools like Booster Energy Capsules, Bravery Charm, Panic Mask, Luxurious Cape, Box of Disaster, Choice/Defiance/Vitality Band, Forest Seal Stone if it hasn't been used yet, etc.
==========
Counter Catcher
")
-I used to run 3 Boss's Orders because getting the mon you need to kill up front is IMO one of the most important things, but replaced one with Counter Catcher to have an item that can be used without using up your one-per-turn supporter and can be pulled with Arven
==========
Switch
")
-Only one switch in this deck - this deck runs incredibly slim by synergizing Starbirth's 'pick 2 of any card' superpower with a huge variety of cards with very specific purposes to counter as many different matchups as possible - switches are mostly up to Serp VSTAR pivoting, a Jet Energy and Cheren's Care/Turo's Scenario.
==========
>>>SUPPORTERS<<<
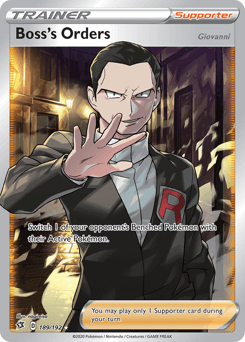
Boss's Orders
")
-If I had the space I would absolutely be batshit enough to run 4 because board control over getting the right opposing mon you need to kill up front exactly when you need to kill it is so important to me
==========
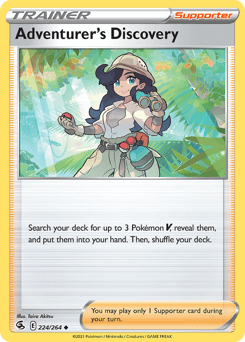
Adventurer's Discovery
")
-The only other supporter I run more than one of because it is CRUCIAL for getting all your V cards out ASAP
==========
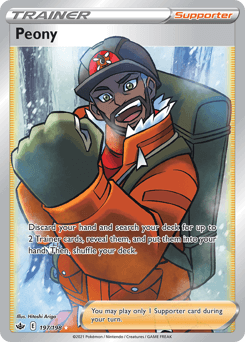
Peony
")
-He's basically like a diet Arceus Starbirth, and this deck relies heavily on the ability to get exactly the right cards you need when you need them
-Don't forget he's a supporter, which means you can't use him to draw another supporter and use it that same turn.
-Also don't forget that if you are pulling Lost Vacuum or Ultra Ball, you will only have 2 cards in your hand - with Lost Vacuum you'll have to discard whatever second card you pull with him, and with Ultra Ball you'll have to wait another turn to have 2 cards to discard at all
==========
Cheren's Care
")
-Huge deck MVP honestly, works specifically with Arceus
-Have Arc hit with Trinova to chunk out damage and turbo energize your bench, take a hit itself as a meatshield, and then pull it off the board, denying prize cards, wasting enemy turns/energy, and preserving your energies.
==========
Professor Turo's Scenario
")
-Similar to Cheren's Care, but can be used on any pokemon
-Don't forget this comes at the cost of discarding any energies or tools attached to them
-Helps if you end up with something you dont want in your initial active spot with no way to switch them out
-Can deny prize cards if you have a mon that's about to die on the board (especially Serp VSTAR after it has used Blender to share it's energy so it won't be discarded) or if something ends up on the board that's useless for your matchup to keep it from getting sniped
-One of the few cards that helps with mon switching - otherwise it's all up to a single Switch/Jet Energy, Cheren's Care and Serp VSTAR pivots
==========
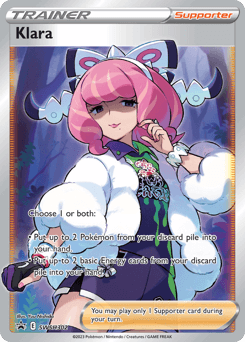
Klara
")
-This is the only card in this deck that can recover cards from your discard pile in any way at all, period.
-Keep this in mind when planning out your energy for Gira - you want to keep as much of this deck's slim energy in play as possible (which is why Serp VSTARs Blender and Cheren's Care are so important for preserving it instead of it getting lost on KO), and this is your only option to recover any of it.
-I chose her over things like Energy Retrieval/Recycler or Super Rod (as much as having an item instead of a supporter would be nice) because she can get both pokemon and energy back, and can put it directly in hand instead of in deck where you have to search for them again.
==========
Iono
")
-I basically use Iono instead of Professors Research to re-draw a bad hand since I hate having to discard cards
-Can also fuck over opponents you're currently losing to or who you can tell are planning their hand for future turns
==========
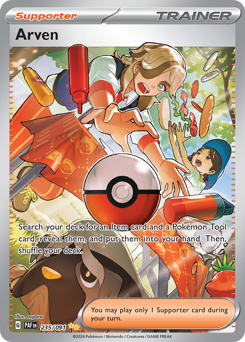
Arven
")
-Used to not include him but I started needing a lot of TM tools, and getting the right items when you need them can come in clutch
==========
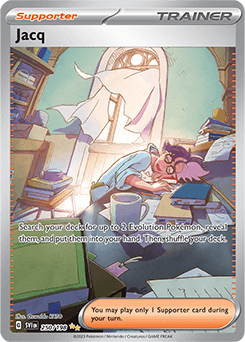
Jacq
")
-Chose him over other options because I was struggling to get Toedscruel when I needed it since it can't be pulled with Adventurer's Discovery or Nest Ball, and can also grab VSTARs if Adventurer's Discovery isn't available
==========
>>>TOOLS<<<
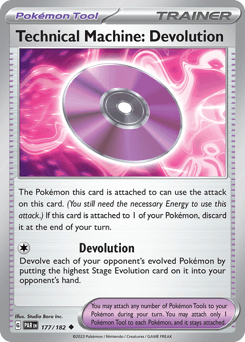
Technical Machine: Devolution
")
-One of the only good counters for stage 2 rare candy decks like Charizard EX, Gardevoir EX, Blastoise EX, Meowscarada EX, Garchomp EX, Tyrannitar EX, Inteleon VMAX, Chien-Pao Baxcalibur, etc. Not only does it ruin evolution lines that were rare candied and don't have a stage 1 underneath and forces your opponent to either burn through more rare candies or evolve with a stage 1 (if they even have one in their deck - if they don't have the corresponding stage 1 or any more rare candies they're just fucked), but if they have enough damage on them already to surpass the HP of whatever it devolves into, it gets KO'd.
-TMs are cool because you can even use them on non-attacking toolbox mons if they end up in the active spot and for only 1 energy, letting you use a disposable one prizer to protect your main mons while disrupting or killing your opponent's
-Works really well against Tera Charizard EX decks, since not only does it do all of the above, it also KO's a one prizer instead of 2 to keep control over how much damage Charizard's Burning Darkness does, and also stops Pidgeot EX in its tracks (and can kill it if they used it to take a hit and retreat.)
-Also extremely helpful for countering Mew VMAX - Mew V only has 180 HP, so if it's already been hit by Arc, Serp or Gira and tries to retreat, that high VMAX HP evaporates, and it will get KO'd and still give 2 prize cards.
-This works on every mon on your opponent's board, meaning that if something got hit and retreated (like Mew VMAX with it's high HP and no retreat cost, Inteleon VMAX/Urshifu VMAX if it tries to take a hit and retreat with Tower of Waters or it's double Rapid Strike energy, or evolved EX cards) you can still KO it just by devolving it on the bench - and even multiple mons at a time.
==========
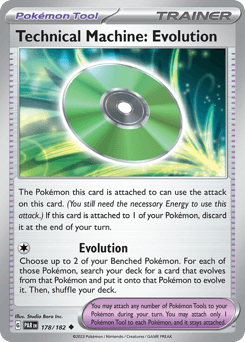
Technical Machine: Evolution
")
-I keep this in the deck for when I have a hard time getting evo cards like Toedscruel that can't be pulled with Adventurer's Discovery
-Also can just help in general with getting mons like Serp VSTAR or Arc VSTAR evolved ASAP if you haven't been able to
-Once again remember that TMs can be used even on non-attacking toolbox mons that end up in the active spot and for only 1 energy, letting you use them to get Arc, Serp, Toedscruel or whatever else you need evolved if you haven't been able to otherwise, while also protecting your main mons with a disposable one prizer
==========
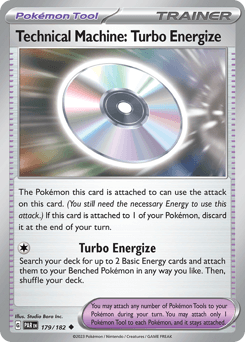
Technical Machine: Turbo Energize
")
-Like the other TMs, this can be really clutch for using a disposable one prizer to get 2 energy on your main mons if Arc VSTAR's Trinova isn't available yet or if you don't have a DTE when you need one (sets up Arc V's Trinity Charge/Trinova if you didn't pull the energy needed already)
-Also can put energy on other non-V mons like Mimikyu and Toedscruel if needed
==========
Leafy Camo Poncho
")
-Really funny evil card that fucks a lot of people up in a very satisfying way by blocking them from grabbing your damaged VSTARs from your bench with Boss's Orders to try to finish them off.
-Works great on Arc VSTAR after it turbos everyone, takes some hits and retreats, and on Serp VSTAR so it can take some hits+retreat for free+not get pulled back out to get killed.
-Don't forget they have to be VSTARS, not just V.
-I feel like people tend to not notice it's there a lot so it's great at wasting their supporter turn, burning through their Boss's Orders and denying prize cards.
-Keep in mind it does NOT block items like Counter Catcher, Escape Rope and Cross Switcher.
==========
>>>STADIUMS<<<
Path to the Peak
")
-I really wish I could run more than one stadium but this deck is packed to the brim already. Lost Vacuum is there to make up for not having more stadiums to replace your opponent's with.
-Path is too important for too many matchups to forego it for anything else IMO, since so many decks rely on rulebox mon abilities and it just flat out turns them off.
-Cockblock opposing Arc VSTARS from using Starbirth, keep Tera Charizard EX and Gardevoir EX from being able to turbo energy, stop Pidgeot EX from grabbing cards (keep in mind it's attack can destroy stadiums though), stop Lugia VSTAR from summoning Archeops to turbo energize itself (and also like Pidgeot remember it's attack can destroy stadiums), stop Chien-Pao and Origin Palkia VSTAR from grabbing energy, stop Gholdengo EX from drawing cards, stop Espathra EX from forcing you to attach more energy, stop Meowscarada EX and Iron Valiant from spreading damage counters, etc etc etc, and this is only scratching the surface
-It is p a i n f u l to throw down before being able to use Starbirth, but sometimes it's in your best interest to use it even if it would block your own abilities if your opponent's are threatening enough - more reasons it's the only one I could justify picking because it's important enough to need to fuck yourself over with it if the situation calls for it
-Don't forget Path works on Radiants too since they have ruleboxes! Great at paralyzing Radiant Greninja draw engines, stopping Radiant Alakazam from spreading out damage counters, and forcing Radiant Charizard to attach all 5 of those energies
==========
>>>ENERGY<<<
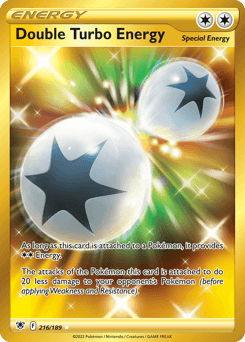
4 Double Turbo Energy
")
-These are Arc's bread and butter to set up Trinova in just 2 turns
-Also excellent spare kindling for Gira to burn into the lost zone
-Can also be used to single turn retreat things with 2 star retreat costs like Toedscruel, Arc, Gira and Radiant Tsareena
==========
1 Jet Energy
")
-Deck is a bit starved for mon switches short of Serp VSTAR pivots, so one of these guys can help a lot
==========
5 Basic Grass Energy
5 Basic Psychic Energy
")
")
-This is just slim enough to fit into the deck while also being just enough to usually manage to energize everything you need with careful energy management planning between Arc's Trinova and Serp's Blender.
-Just gotta pray that most of your energies don't get prized, but even if they do Serp VSTAR's Blender is amazing at preserving very few energies for a long time.
==========
>>>OTHER OPTIONS<<<
Since this is basically just a weird toolbox deck that uses Arceus and Peony to grab any specific cards you may need, there are a LOT of good cards you can swap in and out of rotation to tweak to your liking or to the current meta. I have a list of good cards to keep in rotation but I'll type that up later............................
==========
>>>OPENING HAND TESTS<<<
[Giratina V, Cheren's Care, Boss's Orders, Adventurer's Discovery, Leafy Camo Poncho, Double Turbo Energy, Basic Psychic Energy]
Turn 1, If you go first: Put Gira in the active spot, and hope that you draw Arceus V or a Nest/Ultra Ball to get it on your bench turn 1. If you have to use Ultra Ball, discard Leafy Camo Poncho and the psychic energy - You'll want to keep all of those supporters. If you do, attach the DTE to Arceus and end your turn. If you don't, attach the psychic energy to Gira and end your turn.
If you go second: Use Adventurer's Discovery to get Arceus V, Arceus VSTAR and Serperior V. Put Arc and Serp on your bench, attach the DTE to Arc and end your turn.
Turn 2: If you were able to get Arceus on your bench the previous turn, use Adventurer's Discovery to get Arceus VSTAR, Serperior V and Serperior VSTAR (or Giratina VSTAR if you went second and already got Arc VSTAR and Serp V). Evolve Arceus VSTAR and put Serperior V on your bench. Use Starbirth to get a Jet Energy (or Switch if it's prized) and something else that suits your matchup - already having Cheren's Care to pull Arc off the board is great and gives you more options to choose. Attach the Jet Energy to Arceus to move it to the active spot (or attach the psychic energy and use Switch), and use Trinity Nova to attach three of a combo of grass and psychic energies to Serperior.
Remember to try to keep an even proportion of grass-to-psychic energies in your deck - Serp only needs one Grass energy, so give it 2 grass energies if there are more grass than psychic energies in your deck and vice versa, but make sure to put at least one psychic energy on it to pass to Gira or Mimikyu even though it doesn't need it for itself.
Next turn, try to get Serp evolved - If you do and if Arc is in bad shape, pull it off the board with Cheren's Care, move Serp to the active spot, put Arc back on the board and re-attach the DTE to it, and use Serp's Regal Blender to give Arc one of its energies. If Arc is still in good health, don't bother with Cheren's Care yet unless you can tell it will get KO'd next turn, and just use Trinova to attach energy to Gira.
After that, evolve Arc VSTAR again, attach the jet/psychic energy that you pulled back with Cheren's Care earlier to Serp, retreat it to swap in Arceus (MAKE SURE IF YOU ARE ATTACHING THE JET ENERGY TO SERP THAT YOU DO SO BEFORE YOU RETREAT IT SO IT DOESN'T GET KICKED BACK INTO THE ACTIVE SPOT) and use Trinity Nova to attach energy to Giratina.
If you weren't able to get Arceus on turn 1 or 2, use Adventurer's Discovery to get Arceus V, Arceus VSTAR and Serperior V. Put Arceus and Serperior on your bench, attach the DTE to Arceus, and use the psychic energy you attached to Gira to use Abyss Seeking to draw more cards. You can also use TM Turbo Energize attached to Gira if you get it instead of Abyss Seeking to attach a third energy to Arc and another to Serp, or TM Evolution to immediately evolve Arc and Serp if there's copies of their VSTARS in your deck still - always make sure you're checking your deck anytime you have a chance to search it to figure out what's prized since you don't have Heavy Ball.
Next turn, try to do the steps above to get Arceus up and running, and consider getting another Adventurer's Discovery with Starbirth to get Serperior VSTAR and Giratina VSTAR if you don't need anything else.
==========
[Arceus V, Mimikyu, Radiant Tsareena, Boss's Orders, Klara, Leafy Camo Poncho, Double Turbo Energy]
Pretty good hand! Arc V and a DTE in your opening hand is exactly what your best case scenario goal is, and having Mimikyu, Tsareena and Boss's Orders available are great too.
Turn 1, If you go first: Put Arceus V in the active spot and attach the DTE to it. Don't put down Mimikyu or Tsareena until you see what your opponent has and can tell if you need them on the board or not. End your turn.
If you go second: Do the same as above, but since you can use a supporter, see if you have an opportunity to use Boss's Orders to disrupt your opponent - You won't be able to do any damage with Arc V yet since it won't have 3 energy for Power Edge, but you can still drag up a mon they won't want there if you need to/feel like it would be worth it to do so, like those with a heavy retreat cost or something that isn't as threatening if they have something that will hit hard next turn. You can aso just save the Boss's Orders for later if you don't think it would be worth using yet.
Next turn, hope that you get a way to evolve Arceus like pulling Arc VSTAR or getting it through Adventurer's Discovery, Jacq, Iono or Ultra Ball (or Arven to pull Ultra Ball). Use Starbirth to grab Adventurer's Discovery and a basic energy to attach to Arc, then use Adventurer's Discovery to get Serp V, Serp VSTAR and Gira V to put on your bench for Arceus to energize with Trinova.
If you can't evolve, it would probably be good to go ahead and put down Mimikyu just to make sure you have bench backup, then use Trinity Charge to give Arc it's third energy while you wait to evolve - Even better if you can at least get your other V mons on the board with Nest Ball or Iono to energize with Trinity Charge, and then you can either retreat or hit with Power Edge if you're still alive and unevolved.


Other Decks on pokemoncard.io
 Cool
0
Cool
0
 Funny
0
Funny
0
 Angry
0
Angry
0
 Sad
0
Sad
0